

For years, crypto trading revolved around centralized exchanges (CEXs) like Coinbase or Binance. These platforms held your funds and matched orders in the crypto market. But decentralized exchanges (DEXs) have changed that model entirely.
With a DEX, you trade directly from your wallet. There is no need for intermediaries, no account sign-ups, and no company holding your crypto. You have full control of your assets while smart contracts handle the trade automatically on the blockchain.
This guide walks you through how to trade on a decentralized exchange from start to finish, covering wallet setup through your first confirmed swap. You’ll find examples from well-known platforms like Uniswap (Ethereum) and PancakeSwap (BNB Chain) so you can follow along with a familiar platform.
Key takeaways
- Wallet security is everything. Treat your seed phrase like cash.
- Start small. Make test transactions to get familiar before trading larger amounts.
- Understand all fees (gas, slippage, protocol) before you confirm.
- Verify token contract addresses to avoid scams or fake tokens.
- Stick to reputable, audited platforms with strong user communities.
- Never trade on emotion. Avoid rushing or FOMO-driven swaps.
Centralized (CEX) vs. decentralized (DEX)
A centralized exchange (CEX) functions much like a traditional bank for crypto. It holds your funds and manages trades. When you trade on a CEX, the platform temporarily controls your crypto, meaning you don’t directly own the funds sitting in your trading account.
A decentralized exchange (DEX) removes that middle layer entirely. You keep full custody of your assets, and trades happen peer-to-peer through smart contracts on the blockchain. No company holds your funds or personal data. The trade-off? You gain independence and privacy, but you also take full responsibility for your wallet security, gas fees, and any errors during the process.
Here is a side-by-side comparison so you can see the difference between the two.
| Feature | Centralized exchange (CEX) | Decentralized exchange (DEX) |
|---|---|---|
| Custody | The exchange holds your funds and private keys. | You hold your own funds and private keys. |
| Account setup | Requires registration and KYC verification. | No registration or KYC — connect a crypto wallet. |
| Trade execution | Orders matched by the exchange’s servers. | Swaps executed directly on-chain via smart contracts. |
| Security model | Relies on the exchange’s internal systems. | Relies on blockchain transparency and wallet security. |
| Control of assets | Exchange can freeze or restrict access. | Full user control; you can trade anytime from your wallet. |
| Example platforms | Coinbase, Kraken, Binance | Uniswap, PancakeSwap, Curve |
What you need to trade on a decentralized exchange
Before making your first trade, you’ll need a few essentials — a wallet, some crypto for fees, and a basic understanding of how to protect it.
Start with a Web3 wallet such as MetaMask (browser or mobile) or Trust Wallet (mobile). These wallets connect directly to decentralized exchange platforms and hold the tokens you’ll trade.
You’ll also need a small amount of the blockchain’s native token to cover network “gas” fees — the transaction costs paid to validators. Examples include ETH on Ethereum, BNB on BNB Smart Chain, and MATIC on Polygon.
Next, make sure you already hold the token you plan to swap. If you want to trade USDC for ETH, you must have USDC in your wallet first — decentralized exchanges don’t supply tokens, they only exchange what you already own. You can get tokens from a centralized exchange (like Coinbase or Binance) or through on-ramp services built into many wallets.
Finally, protect your funds. Your private key and seed phrase control access to your crypto. Never store them online. Write them down and keep them safely offline, just like you would cash or important documents.
Learn how to set up your crypto wallet
Choosing your decentralized exchange
Most decentralized exchanges follow similar steps, so once you learn one, you can use almost any of them with ease. We’ve used Uniswap and PancakeSwap as examples, but the same principles apply across all major platforms.
If you’re comparing platforms, our DEX comparison tool lets you track 24-hour, 7-day, and 30-day trading volumes. This can help you identify which platforms have the most liquidity and active users before you trade.
Popular decentralized exchange examples
- Uniswap – Originated on Ethereum; now supports multiple chains like Arbitrum and Polygon.
- PancakeSwap – Native to BNB Smart Chain, known for fast, low-fee swaps.
- Curve Finance – Focused on stablecoin trading; operates across Ethereum and other networks.
- Raydium – Built on Solana, offering ultra-low fees and high speed.
- Trader Joe – The top decentralized exchange on Avalanche, combining swaps with lending and yield features.
Decentralized exchange fees and costs explained
Each trade on a decentralized exchange comes with costs. While these platforms don’t charge account or withdrawal fees like centralized exchanges, swaps still involve network (gas) fees and trading (swap) fees.
Gas fees are small payments made in the blockchain’s native token to process your transaction on the network. These fluctuate depending on how busy the network is. Swap fees, on the other hand, are charged by the decentralized exchange itself (usually between 0.1% and 0.3%) and go to the liquidity providers who enable trading.
Both fees are automatically calculated and shown before you confirm a transaction, so you’ll always know the total cost upfront.
Gas fees are typically lower when fewer people are using the network — usually late at night or early morning UTC, and often on weekends. Before you trade, check live gas prices on tools like Etherscan Gas Tracker or Blocknative. If fees look high, wait a bit. It can make a real difference over time. Always keep a small gas buffer in your wallet in case prices move slightly during your transaction.
Use cheaper networks when possible. Layer-2 networks such as Arbitrum and Optimism offer faster, cheaper swaps than Ethereum mainnet. To use them, you’ll need to bridge your tokens from one network to another — see our bridging guide for help getting started.
For a deeper comparison, check out our decentralized exchange costs and fees guide.
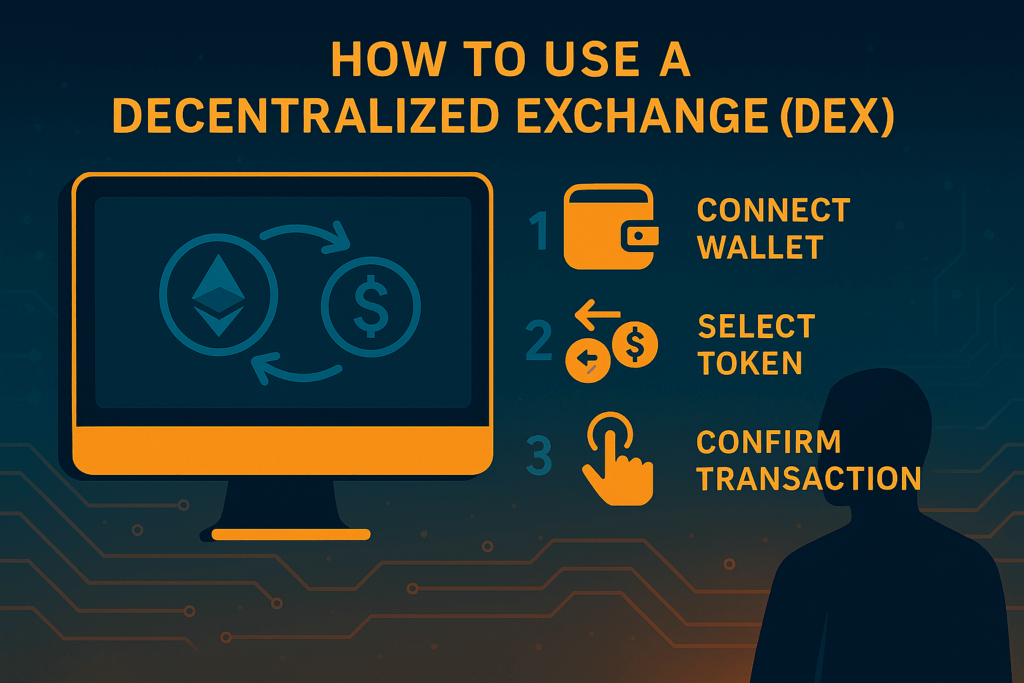
The 7-step trading process
Step 1: Set up your wallet
Before trading on a decentralized exchange, you’ll need a crypto wallet that connects to Web3 apps. MetaMask is one of the most widely used options and works as both a browser extension (Chrome, Firefox, Brave) and a mobile app (iOS, Android).
How to install MetaMask
- Go to metamask.io — always type the URL manually to avoid phishing sites.
- Download and install the extension or app.
- Open MetaMask and select “Create a new wallet” or “Import wallet” if you already have one.
- Set a strong password for local access.
MetaMask will provide you with a seed phrase. This is a 12- or 24-word recovery key that lets you restore your wallet if your device is lost. Treat this as your most important piece of information.
Critical security steps
- Write down your seed phrase offline; never save it digitally or take photos.
- Store it in a secure, fireproof location.
- Never share your seed phrase or private key with anyone.
- Enable password and biometric protection if available.
- Use a hardware wallet for long-term or high-value holdings.
Once your wallet is secured, you’re ready to fund it and connect to a decentralized exchange.
Step 2: Fund your wallet
To trade on a decentralized exchange, your wallet needs to hold both the tokens you want to swap and a small amount of the network’s native token to cover gas fees. Without gas tokens (like ETH, BNB, or MATIC), transactions cannot be completed.
The easiest way to fund your wallet is to buy crypto on a centralized exchange such as Coinbase, Kraken, or Binance. After purchasing your tokens, withdraw them to your personal wallet address. You’ll find this address in MetaMask or Trust Wallet. It is a string of characters starting with “0x.” Always copy it directly rather than typing it out.
Once your transfer is complete, your tokens will appear in your wallet, ready for use on a decentralized exchange.
Important warnings
- Double-check your wallet address. Transactions are irreversible; verify every character before confirming.
- Start with a small test transaction. Send a small amount first to ensure everything arrives correctly.
- Verify the correct network. Always match the blockchain and token type (e.g., Ethereum vs. BNB Smart Chain). Sending to the wrong network can result in permanent loss or a difficult recovery process.
Step 3: Connect your wallet to a decentralized exchange
Once your wallet is funded, you can connect it to a decentralized exchange to start trading.
- Go to the official website. Type the address manually or use a saved bookmark to avoid phishing sites. For example: app.uniswap.org for Uniswap, or pancakeswap.finance for PancakeSwap.
- Click “Connect wallet.” This button is usually located in the top-right corner of the page.
- Select your wallet provider. Choose the option that matches your setup — typically MetaMask, WalletConnect, or Coinbase Wallet.
- Approve the connection in your wallet. A confirmation window will appear. Granting this permission allows the decentralized exchange to view your wallet balance and activity, but it cannot move funds without your explicit approval.
- Verify the connected address. Once connected, confirm that the wallet address shown on the decentralized exchange matches your wallet’s actual address.
If a website ever asks for your seed phrase or private key, disconnect immediately. No legitimate decentralized exchange will ask you for that information.
Step 4: Select your trading pair
After connecting your wallet, it’s time to set up your trade by selecting which token you want to swap from (the input) and which token you’ll receive (the output).
In the interface, use the dropdown menus to choose your tokens. For example, if you want to trade USDC for ETH, select USDC as the input and ETH as the output. Most major tokens will appear automatically in the default list, but if the token you’re looking for doesn’t show up, you can manually add it using its official contract address.
You can find verified contract addresses on trusted sources such as CoinGecko, CoinMarketCap, or the project’s official website or documentation. Copy the exact address and paste it into the search bar to load the correct token.
Warning about fake tokens
- Check contract addresses: Always verify the token address from an official source before adding it to your wallet or trading list.
- Review liquidity: Tokens with deep liquidity and consistent trading volume are generally safer and easier to trade.
- Look for verified badges: A checkmark beside the token name can indicate legitimacy, but it’s not a guarantee. Always double-check before confirming a swap.
Learn how to spot fake tokens on decentralized exchanges
Step 5: Enter trade amount
Once you’ve selected your input and output tokens, enter the amount you want to swap in the trading interface. The decentralized exchange will automatically calculate the exchange rate, estimated output, and any fees included in the trade.
Before confirming, review a few key metrics shown on-screen:
- Price impact: Indicates how your trade size affects the current market price in the liquidity pool. A high price impact means your trade is large relative to the pool and could result in a worse rate.
- Minimum received: Shows the lowest amount you’ll receive after accounting for your slippage tolerance — the acceptable range for minor price changes during the transaction.
- Liquidity provider fee: A small charge (usually 0.01%–1%) included in the quoted exchange rate. This fee goes to the users who supply liquidity to the trading pool.
Take a moment to review these details carefully before proceeding. They help you understand exactly what you’ll receive and how much it will cost.
Step 6: Configure slippage settings
Before confirming a swap, you’ll need to set your slippage tolerance — the acceptable price difference between when you submit your order and when it’s actually executed on the blockchain. Because trades on a decentralized exchange rely on smart contracts and network confirmations, prices can shift slightly in the short delay between those two moments.
If your slippage setting is too high, you risk overpaying or being targeted by front-running bots that exploit wide price ranges. If it’s too low, your transaction might fail and require resubmission (which costs additional gas fees).
Recommended general ranges:
- Major tokens (ETH, USDC, USDT): 0.5–1%
- Mid-cap tokens: 1–3%
- Low-liquidity tokens: 3–5%
- Highly volatile or memecoins: Use the lowest setting that successfully completes the trade
You can adjust your slippage tolerance directly in the interface. This is usually done by clicking the gear icon near the swap button. The chosen percentage will appear on-screen before you confirm.
Step 7: Review, confirm, and verify your transaction
Before executing your trade, take a moment to review every detail. When you click “Swap”, a confirmation window will appear showing the trade summary including the exchange rate, minimum received, and an estimated gas fee. Make sure everything looks correct before approving.
Next, your wallet will display a popup confirmation. Review the transaction again, paying close attention to the gas fee estimate, then click Confirm to submit to the blockchain for processing.
Confirmation times vary depending on network congestion but once it’s processed, do the following:
- Check your wallet for the new token; if it doesn’t appear automatically, you may need to add the token manually using its contract address.
- View your transaction on a block explorer such as Etherscan or BscScan.
- Save the transaction hash (a unique ID) for your personal records or tax tracking.
For a walkthrough, see how to track transactions on Etherscan
Common transaction issues (and how to fix them)
If you run into issues with your transaction, the table below highlights some of the most common problems and how to solve them quickly.
| Problem | Cause | Solution |
|---|---|---|
| Transaction failed | Gas limit too low or network busy | Increase gas limit or wait for less congestion |
| Slippage tolerance exceeded | Price moved too much | Increase slippage slightly or split trade |
| Token not appearing in wallet | Wrong network or token not added | Switch network or add token by contract address |
| Insufficient liquidity | Pool too small | Try a smaller amount or another decentralized exchange |
| Wallet won’t connect | Browser or network mismatch | Refresh, unlock wallet, and verify correct network |
FAQ
Do I need to complete KYC verification to use a decentralized exchange? No. Most decentralized exchanges don’t require Know Your Customer (KYC) verification. You trade directly from your wallet, so there’s no account or identity check. However, this also means you’re responsible for following local regulations and ensuring you’re allowed to trade in your jurisdiction.
What happens if my transaction fails? If a swap fails, your tokens stay in your wallet, but you’ll still lose the gas fee since it’s paid to process the attempt. Common causes include low gas limits, tight slippage settings, or network congestion. Review the error message, adjust settings, and try again with slightly higher gas or slippage tolerance.
Are decentralized exchanges safe to use? Decentralized exchanges are generally safe when you use reputable platforms and practice good wallet security. Your funds stay in your wallet until you confirm a trade, but risks still exist — such as fake tokens, phishing sites, or vulnerable smart contracts. Always verify URLs, token contract addresses, and platform audits before trading.
Can I cancel a pending transaction? Once a transaction is submitted, it can’t be canceled outright. However, if it’s still pending, you can speed it up or replace it in your wallet by resubmitting a new transaction with a higher gas fee. This action overrides the stuck one. If the transaction has already been confirmed, it’s final and irreversible.
Next steps
You don’t need to dive in all at once. Start by setting up your wallet and trying a small trade on a low-fee network like Polygon or BNB Smart Chain. The costs are low, so you can experiment safely and see how everything works.
Once you’ve made a few swaps, consider joining decentralized exchange communities on Discord or Reddit. They’re good places to learn from other traders, find reliable tools, and stay updated on new features or network changes.
Keep this guide handy and consider bookmarking it for quick reference during your first few trades. The more time you spend getting comfortable now, the easier it becomes to remember each step later.
For a walkthrough, see how to track DEX transactions on Etherscan